3D Terrain Creation

This tutorial will showcase how to generate professional looking 3D terrain images.

Get Started

Tutorial Background

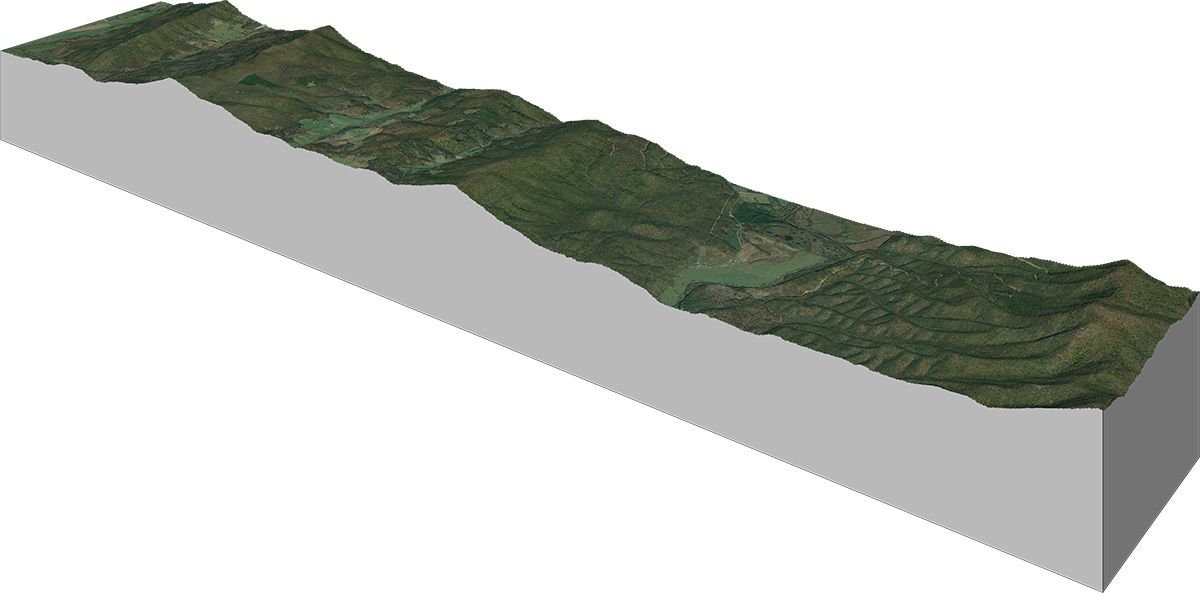
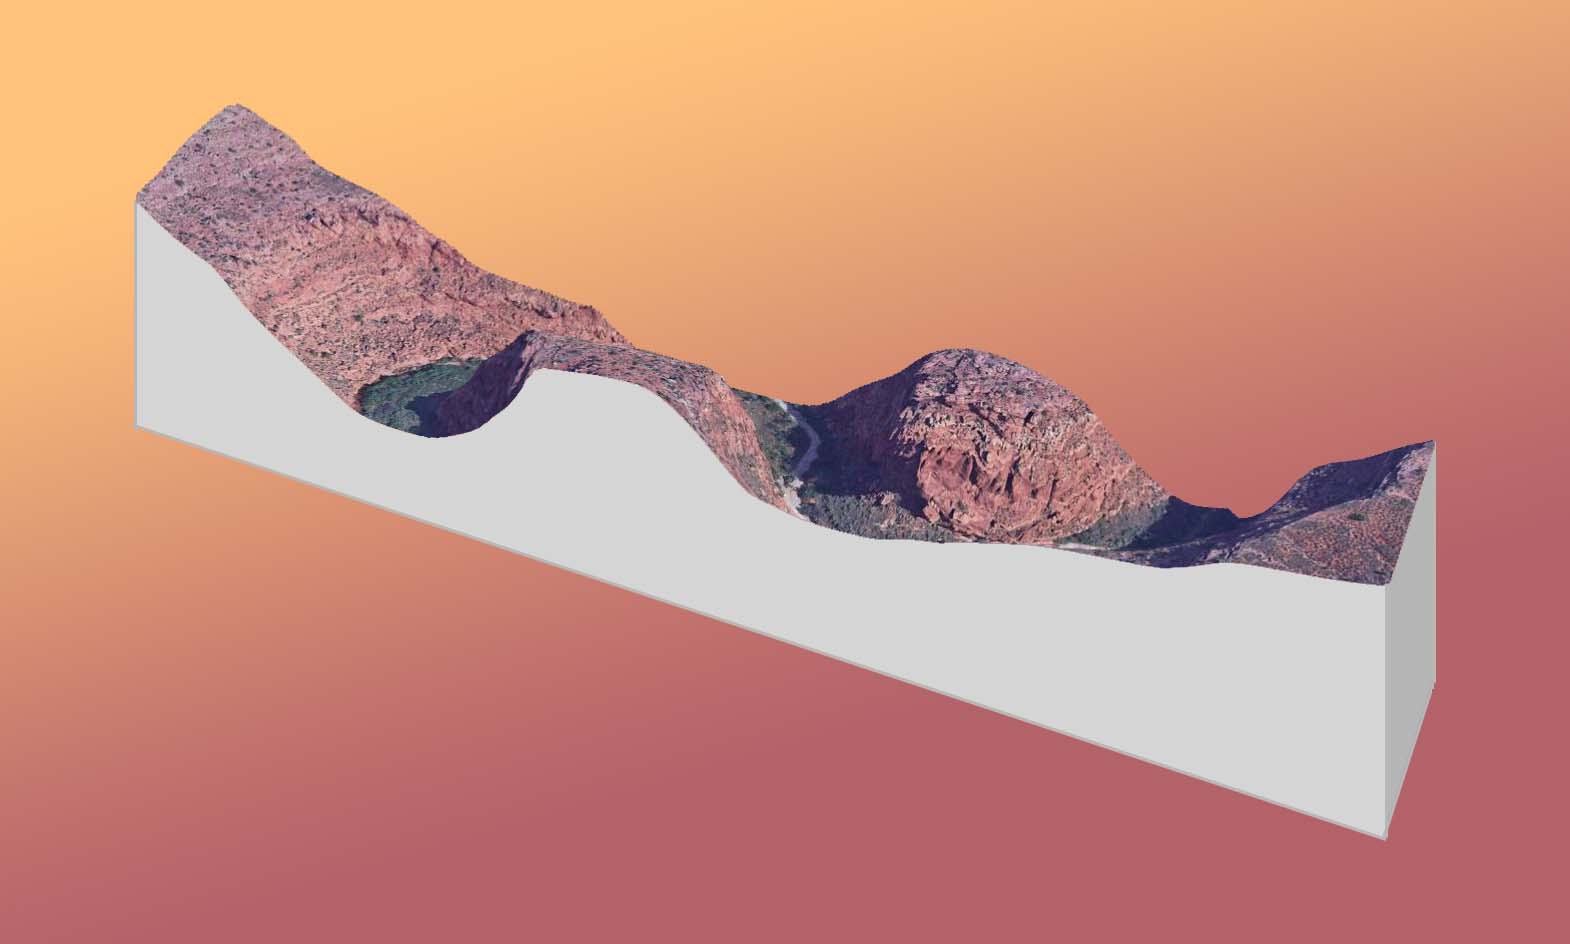
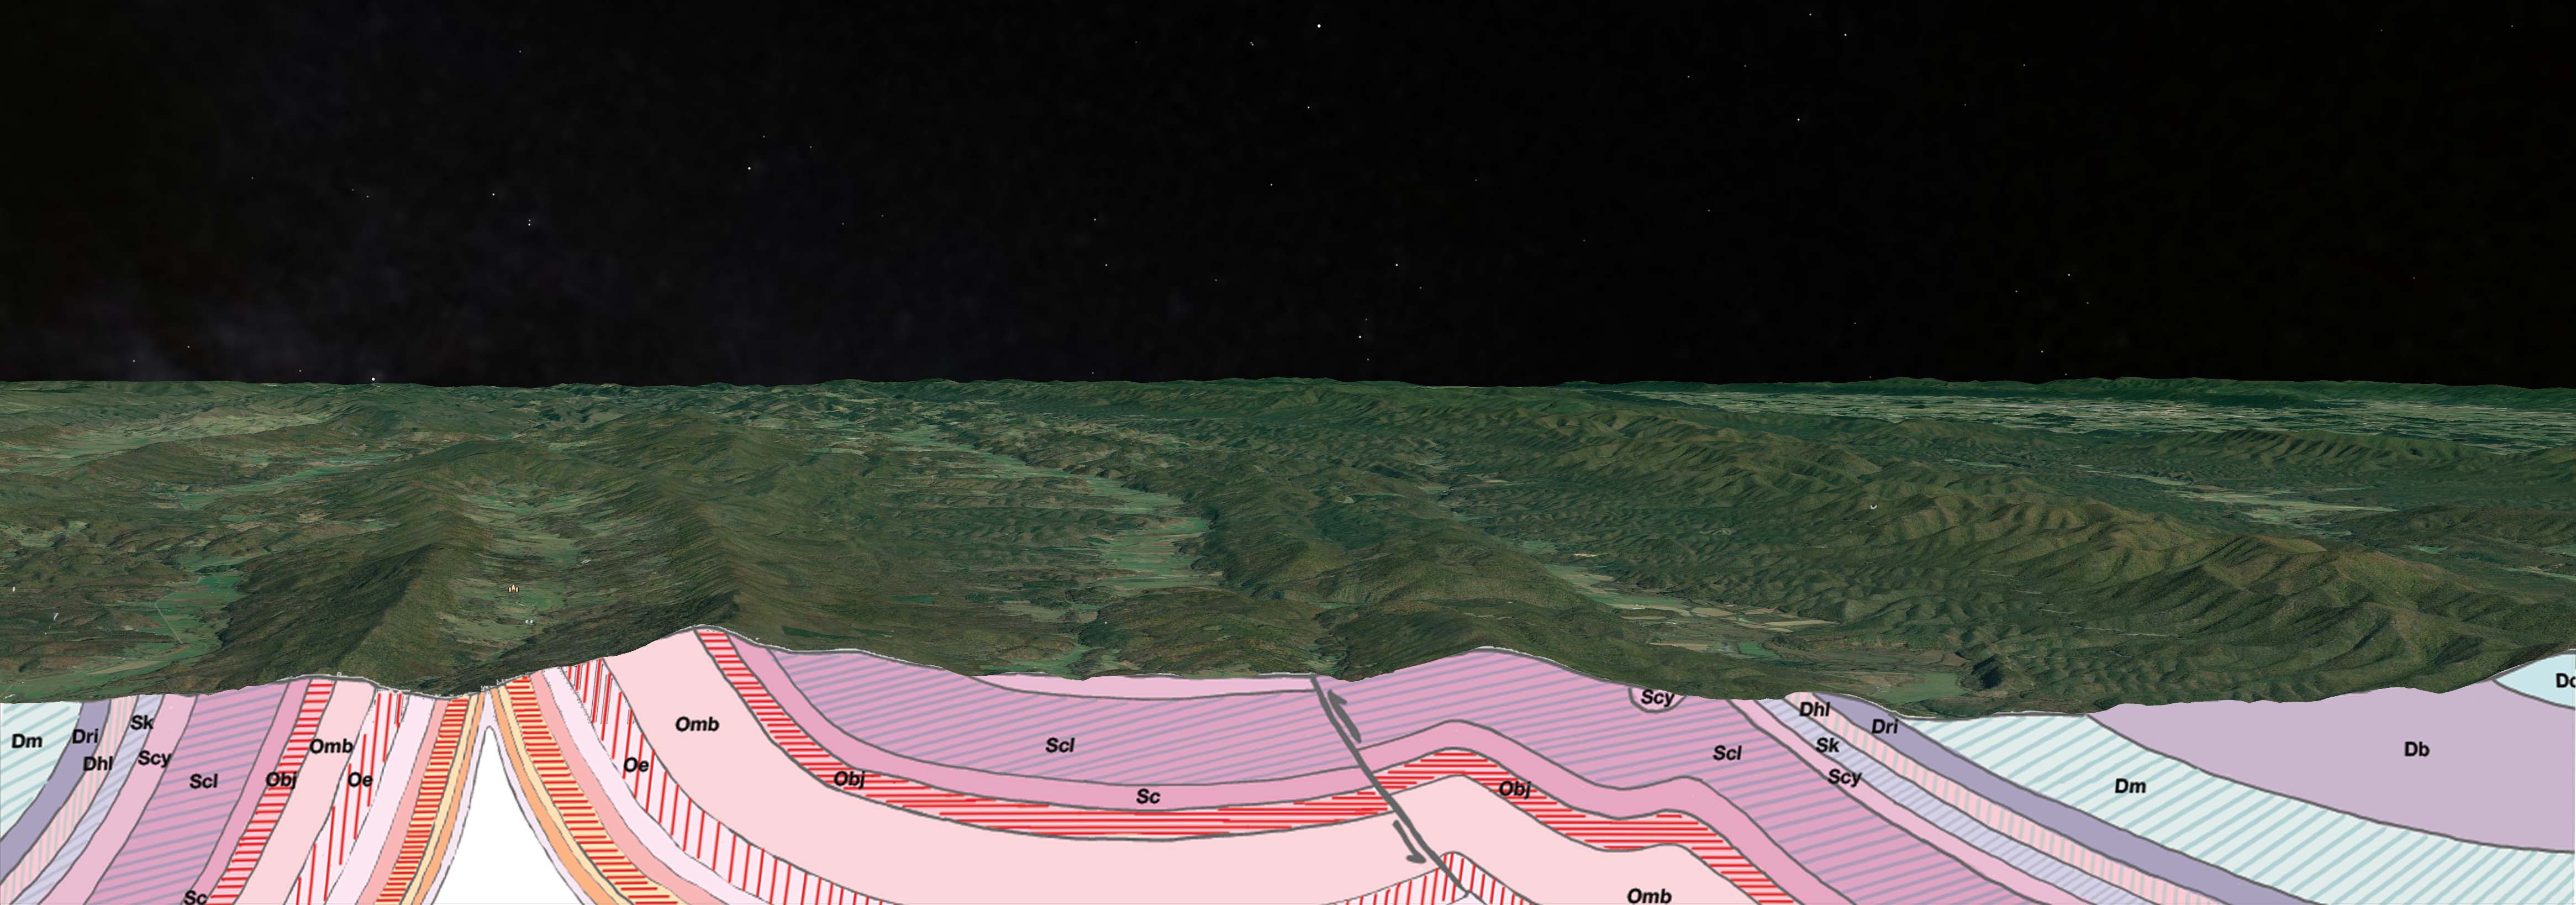
This tutorial will show you how to create a 3D terrain image. These are great for use in presentations, reports, etc. The idea for this was inspired by a web page I came across a while back. I had forgotten about it till I began doing cross sections in my structural geology lab. The process from the other person was a bit more complicated than what I am showing. In his method you had to use photoshop masking and paint brush to get it just right. My method simply hacks, if you will, the Google Earth functions to shortcut right to the finished product. What he indicated would be about 30-60 minutes to complete, my method takes just about 5-10 minutes at the very most.

* Google Earth Pro is free for all now to download
** Any version of Photoshop will work

Step 1: Choose Area

Open Google Earth Pro and then navigate to an area of interest. Preferably one with a good variation in the terrain. I have learned that flatter areas while still possible to create, do not show as well. For my example, I picked an area near Moab, Utah.


Step 2: Turn On/Off Features

Once you have established a place of interest, next we want to turn off un-needed functions in Google Earth Pro. I turn off everything and leave Terrain on. I have left labels on a few times but it will depend on the next step if it is worth having them on.


Step 3: Draw Polygon

Next we use the Polygon Drawing Tool to create a rectangle on the area of interest. You will notice the rectangle will be slightly warped, this is due to the rectangle following terrain. The size of your rectangle also will tell if you can turn labels on or not. Name your polygon in the open dialog box and save it.


Step 4: Save Two Images

Once you have created your polygon, click the Save Image button. Turn off all options in map options. It is also helpful to set your resolution as high as you can. Once you have saved an image with the polygon on, in the "Places" module to the left, turn off your polygon and save an image again without moving the map.


Step 5: Open Images In Photoshop

Next we simply need to open both images in Photoshop, within the same document. We will want the image with the polygon to be on top of the photo without in the layers module.


Step 6: Select Polygon Shape

Make sure the polygon layer is selected and use the magic select tool. Click the polygon and then press CTRL + SHIFT + I to invert the selection. Next turn off the visibility of the polygon layer and click the layer with no polygon. The selection is still active and simply press DELETE (Not Backspace).


Step 7: Add 3D Structure

Next we simply use draw lines to create the 3D structure of the extracted terrain. You can make it as deep or shallow as you would like and use whatever colors you'd like. I chose light grey for the front and a slightly darker grey for the side. I used green lines so they show up.


Final Version


Final Product Variations

3D Geologic Cross Section

Note This was one of the first, of many, cross sections I did in structural geology class. With what I understand now, it would have looked a lot different. As it was time consuming, I won't be re-doing it anytime soon! LOL

Here is an example using the cross section I created on the iPad Pro applied to a 3D extraction I did. I had to warp my cross section slightly in photoshop to fit as there were slight variations from what Google Earth had as opposed to my interpretation of the contours. Nonetheless, you can see how the above tutorial coupled with things like this can be of assistance in reports and or the classroom.


NEXT | iPad Cross Sections

This tutorial I created to highlight how beneficial the iPad can be in created cross section maps. I lack serious artistry skills and I am very pleased with the results of my first real cross section.


Concluding Thoughts

Coming soon